Monday, September 28, 2015

My Other Creations: Butterfly Girl

http://www.simonsaysstampblog.com/mondaychallenge/
Ombre is the name of the game for this week's Simon Says Stamp Monday Challenge.  I decided to use some ombre-esque color blending on the skirt of my paper Butterly Girl.


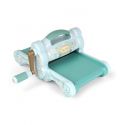
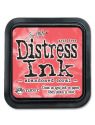
I thought I'd whip out the old Martha Stewart Circle Border Punch Starter kit for this project.  With it, I made a 7" doily using Prima's awesome Royal Menagerie paper.  I cut the doily in half and inked and blended the edges with different colors of Distress Ink.


I bent the doily halves into cone shapes and connected them together.  


Next I stamped and colored this amazing stamp from Penny Black called Melle Papillon.  I cut off the skirt portion of the stamp and attached the girl's torso to my doily skirt instead.


I added some butterflies using my go-to Martha Stewart butterfly punches in the big and smaller sizes and outlined the butterflies with a Sharpie pen. I finished it off with this great quote that's part of Dina Wakley's Collaged Hearts stamp set.


I know you've got some great ombre skills in your repertoire, so be sure to upload your creations to the Simon Says Stamp Monday Challenge Blog for your chance to win a $50 voucher to the Simon Says Stamp store.  I can't wait to see what you dream up!


http://simonsaysstamp.com/http://simonsaysstamp.com/

http://www.simonsaysstampblog.com/mondaychallenge/

Monday, September 21, 2015

My Cards and Tags: Simon Says Stamp STAMPtember Use a Stamp Blog Hop

http://www.simonsaysstampblog.com/mondaychallenge/?p=3119

Welcome, welcome to the STAMPtember Use a Stamp Blog Hop!  We're showcasing some of Simon's STAMPtember products which have just been released and which you can see here.  If you made it my way, you've come from the Simon Says Stamp Store Blog.  Once you've checked out my post, hop on over to the fabulous blog of Anna-Karin!

I am loving Simon's Christmas Graphic set, which I used to make these two tags:


The versatility of this set is amazing!  For the first tag, I used the tree stamp and its background.  I cut out the tree, wrapped it with yarn, then stuck it back on top of the background, which I outlined with Sharpie and added some circles to from the Simon Says Stamp Scribble Flowers set.  I added a Happy Holidays sentiment, some Washi tape with diagonal stripes, some green wire thread by Prima, then adhered the whole thing to a piece of paper from Simple Stories' new Pumpkin Spice line.  I smudged on some Distress Ink in Twisted Citron, Peacock Feathers and Tumbled Glass and finished off the tag with some yarn and an epoxy sticker for the tree topper.


The second tag was made with the trees from Christmas Graphic combined with the Simon Says Stamp Sparkle and Shine set.  I stamped the trees with Memento Luxe Rose bud and the sentiment with StazOn Timber brown.  I added smudges of Tumbled Glass and Forest Moss Distress Ink.  I circled the whole thing with glitter, threw in some fabric scraps, then stuck it to a Santa Bingo card from Bo Bunny's Candy Cane Lane collection.  I cut up a Doodlebug doily for the base, then adhered that to a lovely floral print from Authentique's Infused collection.  I topped the tree with a star from Tim Holtz and added some yarns and fibers.


I had a blast making these tags and I hope you'll participate in our Use a Stamp Blog Hop, too!  All you have to do is make something in which you use a stamp (no digi images allowed).  Add your stamp project to the linky on the Simon Says Stamp Monday Challenge Blog and then hop around to all the designers' pages and leave some love.  As always, Simon's giving away a $50 voucher to the Simon Says Stamp store.  
http://www.simonsaysstamp.com/
As a special bonus, each Design Team member also has a Simon goody bag to give away!  Just comment on my post and enter the Simon Says Stamp Monday Challenge and this little gem could be yours!
http://www.simonsaysstamp.com/

You have until Monday, 8 am Ohio time, 1 pm UK time, 2 pm CET time to join in.  I can't wait to see what you create!
http://www.simonsaysstampblog.com/mondaychallenge/
http://www.simonsaysstamp.com/


Monday, September 14, 2015

Tutorial: Stamping with the Backs of Your Clear Stamps

http://www.simonsaysstampblog.com/mondaychallenge/
We're still going strong with the STAMPtember celebrations over at the Simon Says Stamp Monday Challenge Blog!  This week's theme is, "I love this technique!"  So whip out your favorite stampy-crafty techniques and show us what you've got!  For my "miss you" card, I used one of my favorite stamping techniques, which is to stamp with the BACK of your clear stamps to create unique background shapes.


I started with Avery Elle's Super stamp set, Memento Luxe and Colorbox inks (or your favorite ink that works well with clear stamps), and an acrylic block.  I stuck the skyline clear stamp on my acrylic block backwards so that the smooth/sticky side was facing me and the ridged side that you usually stamp with was stuck to the block.


Using Memento Luxe and Colorbox ink, I dabbed a few different colors onto the back of my stamp.


When the back of my stamp was covered with ink, I hit it with just a couple of quick water spritzes.


I stamped the image onto my pre-cut tag-shaped card (courtesy of the Mama Elephant Tags a Lot set).  Here's how it turned out:


Keep in mind that when you are stamping with the back of your clear stamp, the shape that you stamp will be the opposite of the "normal" stamped image.  So my skyline is not going to line up with the stamp itself.  I like the contrast in this case and when you do this technique with basic shapes like circles or squares, it doesn't matter if you stamp backwards.  The only time it might make a significant difference is if you have an arrow stamp pointing a certain way or if the stamp obviously has one clear direction and you don't want the background "shadow" to be opposite of that.

My next step is to stamp the image right-side up (using the stamp in the normal manner) on top of the background, which I dried with a heat tool.  I used Ranger Black Archival ink to stamp the top image.


You'll notice that the colors didn't stay as vibrant once I dried them with the heat tool, so another one of my favorite techniques is to "smudge" on Distress Ink in various spots to brighten the whole thing up.  I do this using artist sponges or make-up sponges.  I love how it gives some oomph to the colors!


I finished my card by adding the "You are" sentiment from Mama Elephant's Hustle set and added some Geotags to show the distance between the two people.


And are you proud of me for leaving the majority of the card WHITE?  I know- usually I feel the need to color every little micro-speck possible, so I really had to restrain myself this time.  But this technique is a good one and it's really allowed me to get more versatility from my stamps and to look at them in a while new way.

Here are the supplies I used, which you can find at Simon Says Stamp:


I can't wait to see some of your favorite stamping techniques!  Upload your geniusness to the Simon Says Stamp Monday Challenge Blog for your chance to inspire a lot of people and to win a $50 Simon Says Stamp store voucher for yourself.  It's a win-win!
http://www.simonsaysstamp.com/
http://www.simonsaysstamp.com/http://www.simonsaysstampblog.com/mondaychallenge/